


as you may have noticed, the last entry on this blog was the 6th of August, 2009. i know. way too freakin' long. this is now officially an obscure blog that no one reads anymore. blame it on Facebook. but like they always say, it's never to late to pick anything up again.
i have lots of stories to tell but the pics i have ready for upload are those from one of the last classes i had at CSB-SDA (College of Saint Benilde-School of Design and Arts where i just completed a one year Diploma in Professional Photography course). i was about to create an FB photo album for it but i thought maybe it's time for a blog entry. so this is where i shall pick up. yes, i need a story with photos. i don't trust myself to be interesting enough with just words. noop, i am not much good as a writer. i just pretend to be one on my blogs.
so... on to Digpho2 - Digital Photography 2. Prof is Sir Dave Caballero, who seems to be decidedly anti-social on the internet. he has no FB account, no blog, no website, according to him, just email. which means this entry is pretty safe from his prying eyes and i can knock him all i want... hehehe... joke lang! Sir Dave is a tall, dashing, handsome hombre who sometimes answers email in Italian, and who we secretly called Sir Babe--until he grew his goatee to about 6 inches long. then, we had secret longings to either pull it off--especially when we have a hard time with our assignments--or cut it off in one swift motion before he can react. hahah! good thing, the last time we saw him, the goatee was shaved off and he is back to his handsome, dashing self again :-D ayan sir ha, inamin ko na so i hope you don't grow the dang goatee again.
on to the projects. Digpho2 project #1 was photo restoration. we were asked to bring one battered photo. the more battered, the better, said Sir Dave. i should have known better. the more battered, the harder it is to restore!

the good thing is that this is a photo my Nanay. so kahit mahirap, it was worth it. but the darn restoration started me on a roll of being late on my next projects. i think restoring this took me about a month. lesson learned: i can get obsessive and i am a very impatient person!... and i hate photo restoration! the finished product is this. i think di na yata kamukha ni Nanay. but when i showed it to her, she seemed very pleased.
 according to Nanay, this photo was taken for her graduation from seamstress school, which became her profession ever since.
 we were also asked to do grayscale, duotone, tritone, and quatone.

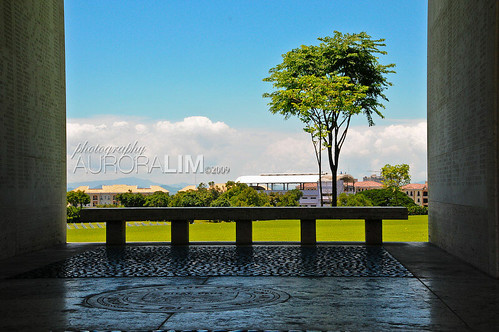
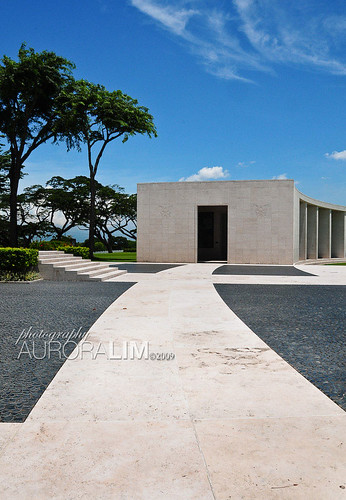
Digpho2 project #2: HDR or high dynamic range photography. the first 12 photos i submitted where rejected by Sir Dave. dang! pare-pareho daw kami ng photos with my other classmates. uhhh... probably because we were all together on the same trip?... hmmmm... in short, late na naman ako for the next project. 3 weeks later, in frustration, i submitted 2 pics. baka sakali may extra points na lang. one was an old HDR attempt, the other one was new and taken from our trip to Tagaytay and Batangas.
 HDR: photo was taken at Nuvali, Sta. Rosa, Laguna
 HDR: altar of The Chapel on the Hill, Don Bosco, Batulao, Batangas
lesson learned: mas magandang mag-submit ng maaga kasi puro minus sa grade ang aabutin mo pag late.
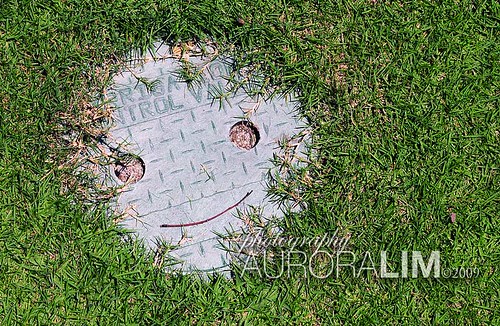
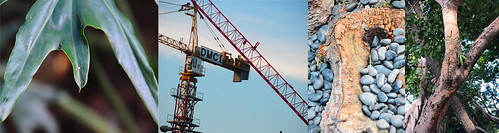
Digpho2 project #3: faux IR (infrared photography). in all honesty, i don't get this one. i don't like 'faux' anything much... especially since i want a real IR camera!!! anyhoo, it's a project i need to submit, so there.
 view from Tagaytay Highlands Clubhouse
Digpho project #4: put yourself in a movie poster... waaaaaahhhhh! this one was kinda scary-funny because it poked fun at ourselves. it's always sort of uncomfortable for photographers to be on the other side of the lens but this one was specially so because we had to be in a costume. but i have to admit it was fun--in a way--because i never would have thought of doing this to myself, myself. it also forced us to be creative--in a way... This was the original poster. And below is the result.

lesson learned: ang hirap i-please ni Sir Dave! haha! although we initially did the search for possible posters, it needed to be approved by our prof! ayaw ng madaling poster. ang gusto pa yung mahirap gawin! ang pamatay dun, after we submit, he often mounts it on the projector at kukulitin in class... switching eyes or mouth with Angelina Jolie's, in Trix's case, or tries to bring the cheekbones higher which ends up like someone beat Tin up.
Digpho project #5: this one is one of my most favorite projects... ever! i love it because i finally got around to trying something i have always wanted to do--conceptual photography. it is probably still amateurish but it's a start. i totally had fun with this one and if not for the time pressure, it would be even more of a pleasure!
 model/angel in the photo is my daughter Gabey and the eye belongs to hubby Erwin.
i like it in both versions, colored and grayscale. lesson learned: i love doing this digital art/conceptual photography/surreal thingy... and i shall do it again... kaya THANK YOU ever so much for helping, in part, uncover my photographer self, Sir Babe... errrr... Sir Dave, kahit pa siguro mababa ang grade ko dahil sa late projects. ;-D


